

Unlike the iPhone, the Mac can quickly turn into a device with many cluttered files. Apple provides you here already with the Finder and powerful tool, which can help you to more organized – but only if you also know and use the small aids. A practical example is, of course, the folder colors, which provide a better overview.
Under macOS High Sierra there are even more possibilities. For example, you can adjust the color of the folder by clicking a few times to suit your needs and thus make it much more personalized. This increases the recognition value for special file groups and sometimes makes finding them easier. For example, you can create color codes to see the current processing status. Finished files can be placed in a green folder, while unfinished files hide behind a red icon.
Finder: How to change the folder color under macOS
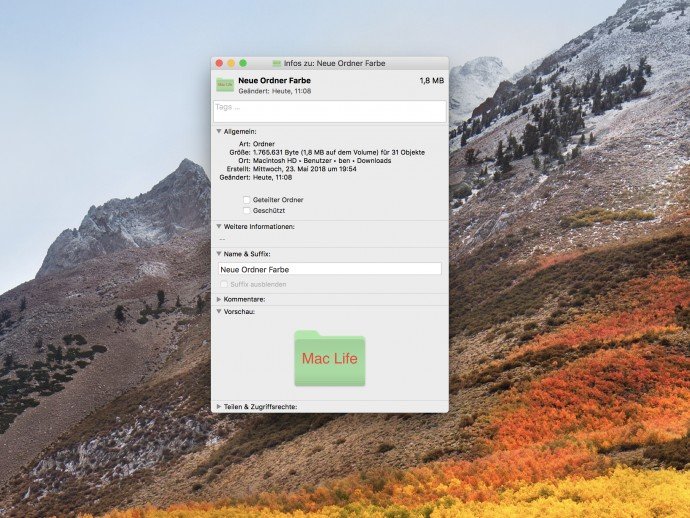
We would like to use a new folder to explain how you can give it a different color or even a different image as an icon. Therefore, first create a folder on your desktop by right-clicking and selecting “New Folder” from the context menu. Now click it with the right mouse button and select “Information”. A comprehensive information window is now displayed. Select the folder icon above the “Tags” input field and copy it by pressing the command key (cmd) + (c) on your keyboard.
Now open the Finder and call up the Applications folder. Start the “Preview” application here. Click on “File > New from Clipboard” in the menu bar to insert the old icon. You will now see several icons. Select one and then click on “Tools > Color Correction” in the menu bar to adjust the color of the new icon. For example, the individual sliders can be used to turn the blue symbol into a green or gray one.
Once you have made your adjustments, the new version must be fully selected. To do this, press the command key (cmd) + (a) so that the software frames the icon in dashed lines. Then copy it by pressing the command key (cmd) + (c) on the keyboard. Now switch back to the info window of the folder. Now select the icon next to the name again and replace it with the new version. Use the command key (cmd) + (v) to insert the changed image. Your folder is now colorful and easier to distinguish.
Professional tip: You can also set other or your own images as folder icons. Copy a photo and paste it as described above.
Summarized again:
- Step 1 : Create a new folder.
- Step 2 : Right-click on the folder and then select “Information”.
- Step 3 : Now click on the folder icon next to the name and then press Command (cmd) + (c).
- Step 4 : Open the preview app and insert the folder via “File> New from Clipboard”.
- Step 5 : Click on “Tools> Color Correction” in the menu bar.
- Step 6 : Use the different sliders to adjust the color of the folder.
- Step 7 : Once you have adjusted the color, press the command key (cmd) + (a) so that the folder is outlined with dashed lines.
- Step 8 : Now press the Command (cmd) + (c) key to copy the folder.
- Step 9 : Return to the info window from step 2.
- Step 10 : Now select the icon again and press Command (cmd) + (v) to change the color.